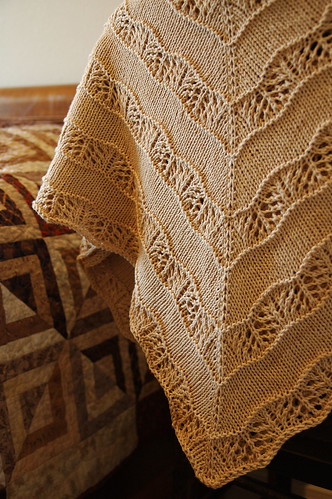
Showing posts with label nursery baby decor. Show all posts

Friday, September 17, 2010

#4 & The Nursery

Some of you may recall the 10 Shawls in 2010 challenge. Two of those shawls have to be over 546 yds. This is my first big one. Big enough in fact, to use as a baby blanket :) Although you can't tell from these pictures, the shawl is square in shape and about 36 inches on a side.

alpaca baby shawl

Alpaca Baby Shawl
in Rowan Purelife Organic Cotton DK, 778 yds.
US 6 needles

I love the softness of this yarn, but I'm reserving final judgement on its long term value. It is naturally dyed and is therefore supposed to be hand washed and stored out of direct sun. If I had checked into the care instructions before purchasing (duh) I might have chosen something more hearty. As it is, I plan to wash and tumble dry the blanket as needed and live with the consequences. The swatch I put through the wash only lightened slightly, although the water did show dye release.

alpaca baby shawl

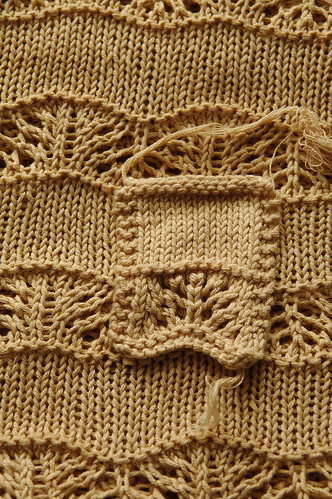
My other boo boo was that I failed to plan on how to join the yarn. It is a fairly thick yarn, has no bounce and little grab. It is spun in multiple very small plies. I tried the knitting with two strands together... too lumpy. Russian join, very obvious. Weaving in didn't seem likely to stay put. I decided to tie knots and clip the ends, which I did. Then I chickened out at the thought of my lovely baby blanket unraveling and went back and dabbed superglue on the knots. Final result: lots of very pokey, hard spots on my soft, yummy baby blanket. So... maybe this will be a decor only / heirloom blanket? Or I could use it inside out? Or the scratchy parts aren't as bad as I imagine? Time will tell.

taupe quilt

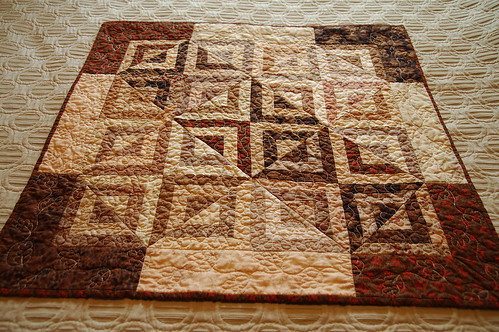
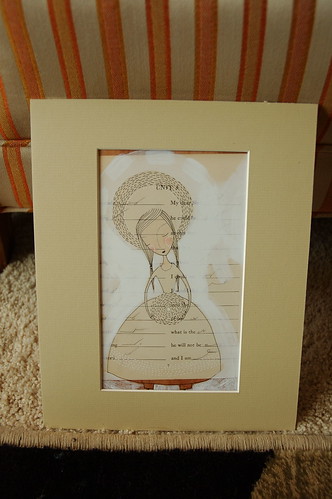
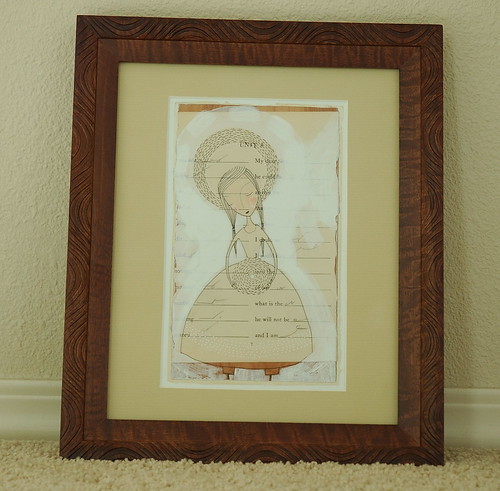
One thing that DOES thrill me about this yarn is how perfectly it matches my nursery color scheme. Maybe I should go back and mention where the idea came from... my mother-in-law made this amazing taupe wall quilt. She named it Taupe for Two and generously gave it to us :) When I found out we were expecting, I decided to use it as the focal point for the nursery. I think its gender neutral enough that if we have a boy it will still work. I also love the thought of quiet, warm colors for a snug little nursery. The shawl I knit coordinates with it and the artwork/frames/mats from earlier also pick up the tan color. I know the nursery is going to be full of all sorts of different colored things, but it is fun to put my stamp on some of it :)

Sunday, July 18, 2010

Adventures in Framing

This year I came across the enchanting artwork of Cori Dantini. Many of her pieces (I think) involve painting and ink drawing over vintage paper. I love her sense of whimsy and the way that snatches of old novels or workbook pages turn into evocative little puzzles when only part of them peeks out...

original

This is her piece "and I am I" (purchased via her etsy shop). The main color for the nursery is going to be brown, so I decided to get this framed up to hang in there. Also, it reminds me of the joy of being able to nurture this little one inside me, so that makes it even more fitting :)

I'm no expert, but here is a bit about my process for matting a picture at home. I hope this can help someone else. At the very least I can use this as a reminder to myself of the things I learned this time!

1. I purchase mat board from the local custom frame shop. It costs $12-17 for a whole sheet - which is usually enough to frame 4-5 pictures (depending on size and mistakes).

2. We have the the Logan Graphics Craft & Hobby Mat Cutter 250. It is sturdy and simple to use. I like that it will cut a beveled edge in such a way that the corners meet up. Yea! It costs about $60, but that is well worth it if you frame stuff all the time.

3. I buy frames at W*lmart or R*ss Dress for Less. It is a good idea to take a tape measure, because frames that end up discounted are often a bit odd. The Fetco "Eco Home" frame I used for this project was labeled as an 8 x 10, but the frame opening is actually smaller. Not a problem for me in this case, but it is the sort of thing you have to look out for.

mat cutting

4. Once you cut your big mat into dimensions that will fit your frame, you trace the lines for the inner opening onto the back of your mat and cut using the bevel edge. Here I have cut out the mat, then traced new lines to make the opening bigger. Corrections like this are hard to make, but this one worked out.

5. Most framing places will tell you to subtract 1/4 to 1/2 an inch from each side of your artwork to get the inner dimension for the mat. Then the mat will actually be covering up the edge of your artwork. That may work well for large pieces, but for small ones, or ones with interesting edges, it seems silly. If you want to get REALLY close to the edge, but not off it, you will find that your tracing and cutting abilities are probably only good to about 1/8 of an inch. So you might have to re-cut the mat several times. Same if you want to be slightly away from the edge of your artwork, and leave an even opening all around.

When I first cut this mat to cover the edges, it really took the life out of the art:

mat one

The edges are so textured...

ragged edge

That is why I went back to make the opening larger.

6. Don't be discouraged when you cut a mat wrong. I cut out four nice mats and four losers!

7. Last tip: use "Goo Be Gone" to get the yucky price label gunk off your frame :) Then slip you mat and art inside, secure the back and enjoy!

finished!

P.S. I also have several other prints of hers that I am framing. More on the nursery to come!