Thursday, July 29, 2010

Epic Summer Sewing

patchwork skirt
(This picture looks dark because there isn't sun in July...)

This year the summer skirt bug was particularly virulent :) Not only did I have to have a skirt, it had to be a patchwork skirt (ie - a skirt that involved more cutting and sewing than I had ever done before). The monster is still not finished, but I thought I would take some notes here so that next time I want to sew a skirt (you know, in two or three years) I'll have some idea of what I did. This won't make sense unless you know the basics for sewing this kind of skirt, but there are plently of online tutorials that will tell you how better than I could...

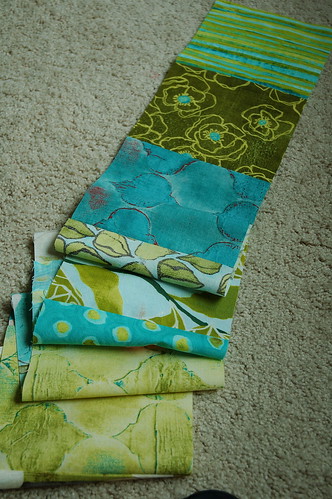
My first decision was what size I wanted each square to be. I decided on larger squares (after sewing most of the blocks are 5.5 inches square) to suit my large print fabrics... and my desire not to sew a million tiny blocks together.

The skirt is sewn in tiers. What you see above is one of the tiers before I attached the first square to the last to form a ring. The mighty internet told me that to make a skirt like this I should start with my desired waist measurement and make each tier of the skirt 1.5 x longer.

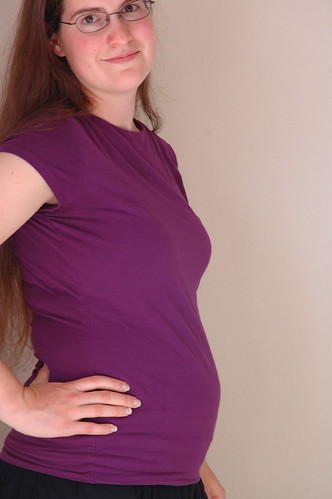
I wanted the waist to be scrunched when worn, and I wanted this skirt to be suitable for maternity wear, so I measured a similar skirt I love and came up with a waist measurement of 50 inches. Um, yeah. This thing is huge. When I say epic, I mean it.

Then, using the measuring tape, I figured out how long I wanted the skirt to be. It was not an exact multiple of the square size I was using, so I made the top tier shorter.

I fiddled around with the numbers for increasing each tier. There was rounding. There was disbelief. There was a measuring tape. I came up with something that sounded big enough, but not too big. Not very technical but true. It is always a good idea to check your crafting math against reality. Otherwise you might end up with a skirt with a bottom circumference of 12 feet - and be surprised.

The most fun thing about this skirt was sewing all the squares into tiers. I knew I would make myself crazy if I tried to perfectly place each square based on its color relationship to the squares around it. So, I assigned each of my fabrics a number, then I had the random number generator at random.org generate a random sequence of the numbers 1-9. I did this 10 times. I just sat there with my blocks stacking them in the order dictated by the numbers.

The least fun part of this skirt was gathering each tier. Fortunately, the machine I am using has a special foot that makes it easier, but it is always hard to distribute the ruffles evenly. The best way seems to be to divide each tier equally into four parts. Then match pins of adjoining tiers and pin together. The larger tier is then scrunched up to fit around the smaller one. Pinning about every 1.5 inches will more or less keep things under control.

Actually sewing the tiers together is the sort of task that makes inexperienced (hormonal) sewers cry, so I just decided that I would do one or two a day and stop if anything when horribly wrong.

So now I'm to the point where I have tried on the skirt. It is full and swishy and wonderful. Now it needs elastic through the casing I made at the waist, a decent hem, and a lining. The lining was a surprise, but the layers of cotton gathered together make scratchy seams inside. So, there must be some way to add one...

Monday, July 19, 2010

Booties

Please stand by for more crafting posts... we are having a low energy day here, but hope for a better tomorrow. To tide you over, here is a photo of some booties my mother's friend made for me.

Natasha's baby booties

Aww....

Sunday, July 18, 2010

Adventures in Framing

This year I came across the enchanting artwork of Cori Dantini. Many of her pieces (I think) involve painting and ink drawing over vintage paper. I love her sense of whimsy and the way that snatches of old novels or workbook pages turn into evocative little puzzles when only part of them peeks out...

original

This is her piece "and I am I" (purchased via her etsy shop). The main color for the nursery is going to be brown, so I decided to get this framed up to hang in there. Also, it reminds me of the joy of being able to nurture this little one inside me, so that makes it even more fitting :)

I'm no expert, but here is a bit about my process for matting a picture at home. I hope this can help someone else. At the very least I can use this as a reminder to myself of the things I learned this time!

1. I purchase mat board from the local custom frame shop. It costs $12-17 for a whole sheet - which is usually enough to frame 4-5 pictures (depending on size and mistakes).

2. We have the the Logan Graphics Craft & Hobby Mat Cutter 250. It is sturdy and simple to use. I like that it will cut a beveled edge in such a way that the corners meet up. Yea! It costs about $60, but that is well worth it if you frame stuff all the time.

3. I buy frames at W*lmart or R*ss Dress for Less. It is a good idea to take a tape measure, because frames that end up discounted are often a bit odd. The Fetco "Eco Home" frame I used for this project was labeled as an 8 x 10, but the frame opening is actually smaller. Not a problem for me in this case, but it is the sort of thing you have to look out for.

mat cutting

4. Once you cut your big mat into dimensions that will fit your frame, you trace the lines for the inner opening onto the back of your mat and cut using the bevel edge. Here I have cut out the mat, then traced new lines to make the opening bigger. Corrections like this are hard to make, but this one worked out.

5. Most framing places will tell you to subtract 1/4 to 1/2 an inch from each side of your artwork to get the inner dimension for the mat. Then the mat will actually be covering up the edge of your artwork. That may work well for large pieces, but for small ones, or ones with interesting edges, it seems silly. If you want to get REALLY close to the edge, but not off it, you will find that your tracing and cutting abilities are probably only good to about 1/8 of an inch. So you might have to re-cut the mat several times. Same if you want to be slightly away from the edge of your artwork, and leave an even opening all around.

When I first cut this mat to cover the edges, it really took the life out of the art:

mat one

The edges are so textured...

ragged edge

That is why I went back to make the opening larger.

6. Don't be discouraged when you cut a mat wrong. I cut out four nice mats and four losers!

7. Last tip: use "Goo Be Gone" to get the yucky price label gunk off your frame :) Then slip you mat and art inside, secure the back and enjoy!

finished!

P.S. I also have several other prints of hers that I am framing. More on the nursery to come!

Thursday, July 15, 2010

More From the Wheel

brown locks


2.9 oz, 164 yds, from drumcarded batts made of Merino x Romney locks

Above in the background you can see one of my favorite spins ever - Hello Yarn Club "Red Velvet" (Shetland Wool Top, 4 oz Approx. 118 yds). There was a secret place in my heart that wanted a little girl to wear something made from this (though of course I have yarns for boys too!). I know that ultrasounds are not entirely reliable, so I'm not trying to keep most of my preparations gender neutral... but one small pink and brown sweater is okay, right?

I spun this yarn rather early in my spinning adventure and it is bulky and low yardage. Turns out there aren't many infant patterns for bulky yarn (not surprising), but I did finally stumble across a DROPS design here. I'm short on yardage, so I spun up the brown Merino x Romney locks. I'm not sure if I should do stripes or just make the front pink and the back brown. I'm planning on getting rid of the texture elements, so just the colors will give the sweater interest. Even if I modify the pattern a lot, it is good to have a gauge and some baby measurements to go by :)

Saturday, July 10, 2010

Tour de Fleece

For several years now, a group of spinners, linked by the internet, has celebrated the Tour de Fleece. Inspired by the athleticism of the Tour de France, these spinners set themselves challenging spinning goals and try to complete them during the time it takes the cyclists to complete their 2,200 mile race. You know what's funny? I thought the concept of the Tour de Fleece sounded perfectly normal until I just explained it here and imagined my non-fiberfiend friends reading about it.... ahem...

Anyway, I am not the stuff that Tour de Fleece champions are made of, but I have been inspired to finish a spinning project that has been on the wheel a while. I'm proud of this because it was a difficult fiber for me (superwash merino/silk) and because I managed to spin it more finely than any other fiber I've spun before :) Hurray!

Tidepool

Tidepool (fiber color by UrbanGypz)
350 yds / 4 oz
80/20 Superwash merino / silk

Friday, July 9, 2010

Rainbows & More

rainbow cake
My sister baked this while she was visiting - she is pretty much made of awesome :)

As usual, summer is flying by too quickly. Camping in Arizona. 4th of July with family and friends. VBS (with 3rd & 4th graders!). Curriculum selection looms on the horizon, and of course 99 billion home projects... several of which involve nursery decor for a very small and precious person... making her first appearance here...


Dr. says he is 90% certain it is a girl. At 21 weeks she is making her presence felt with some belly jumping kicks :) If you are so inclined you can click over to my flickr for a few more belly photos.